> For the complete documentation index, see [llms.txt](https://docs.birdie.so/birdie-docs/llms.txt). Markdown versions of documentation pages are available by appending `.md` to page URLs; this page is available as [Markdown](https://docs.birdie.so/birdie-docs/helpdesk/hubspot/flows/forms.md).
# Forms
How to add Birdie to your HubSpot ticket form
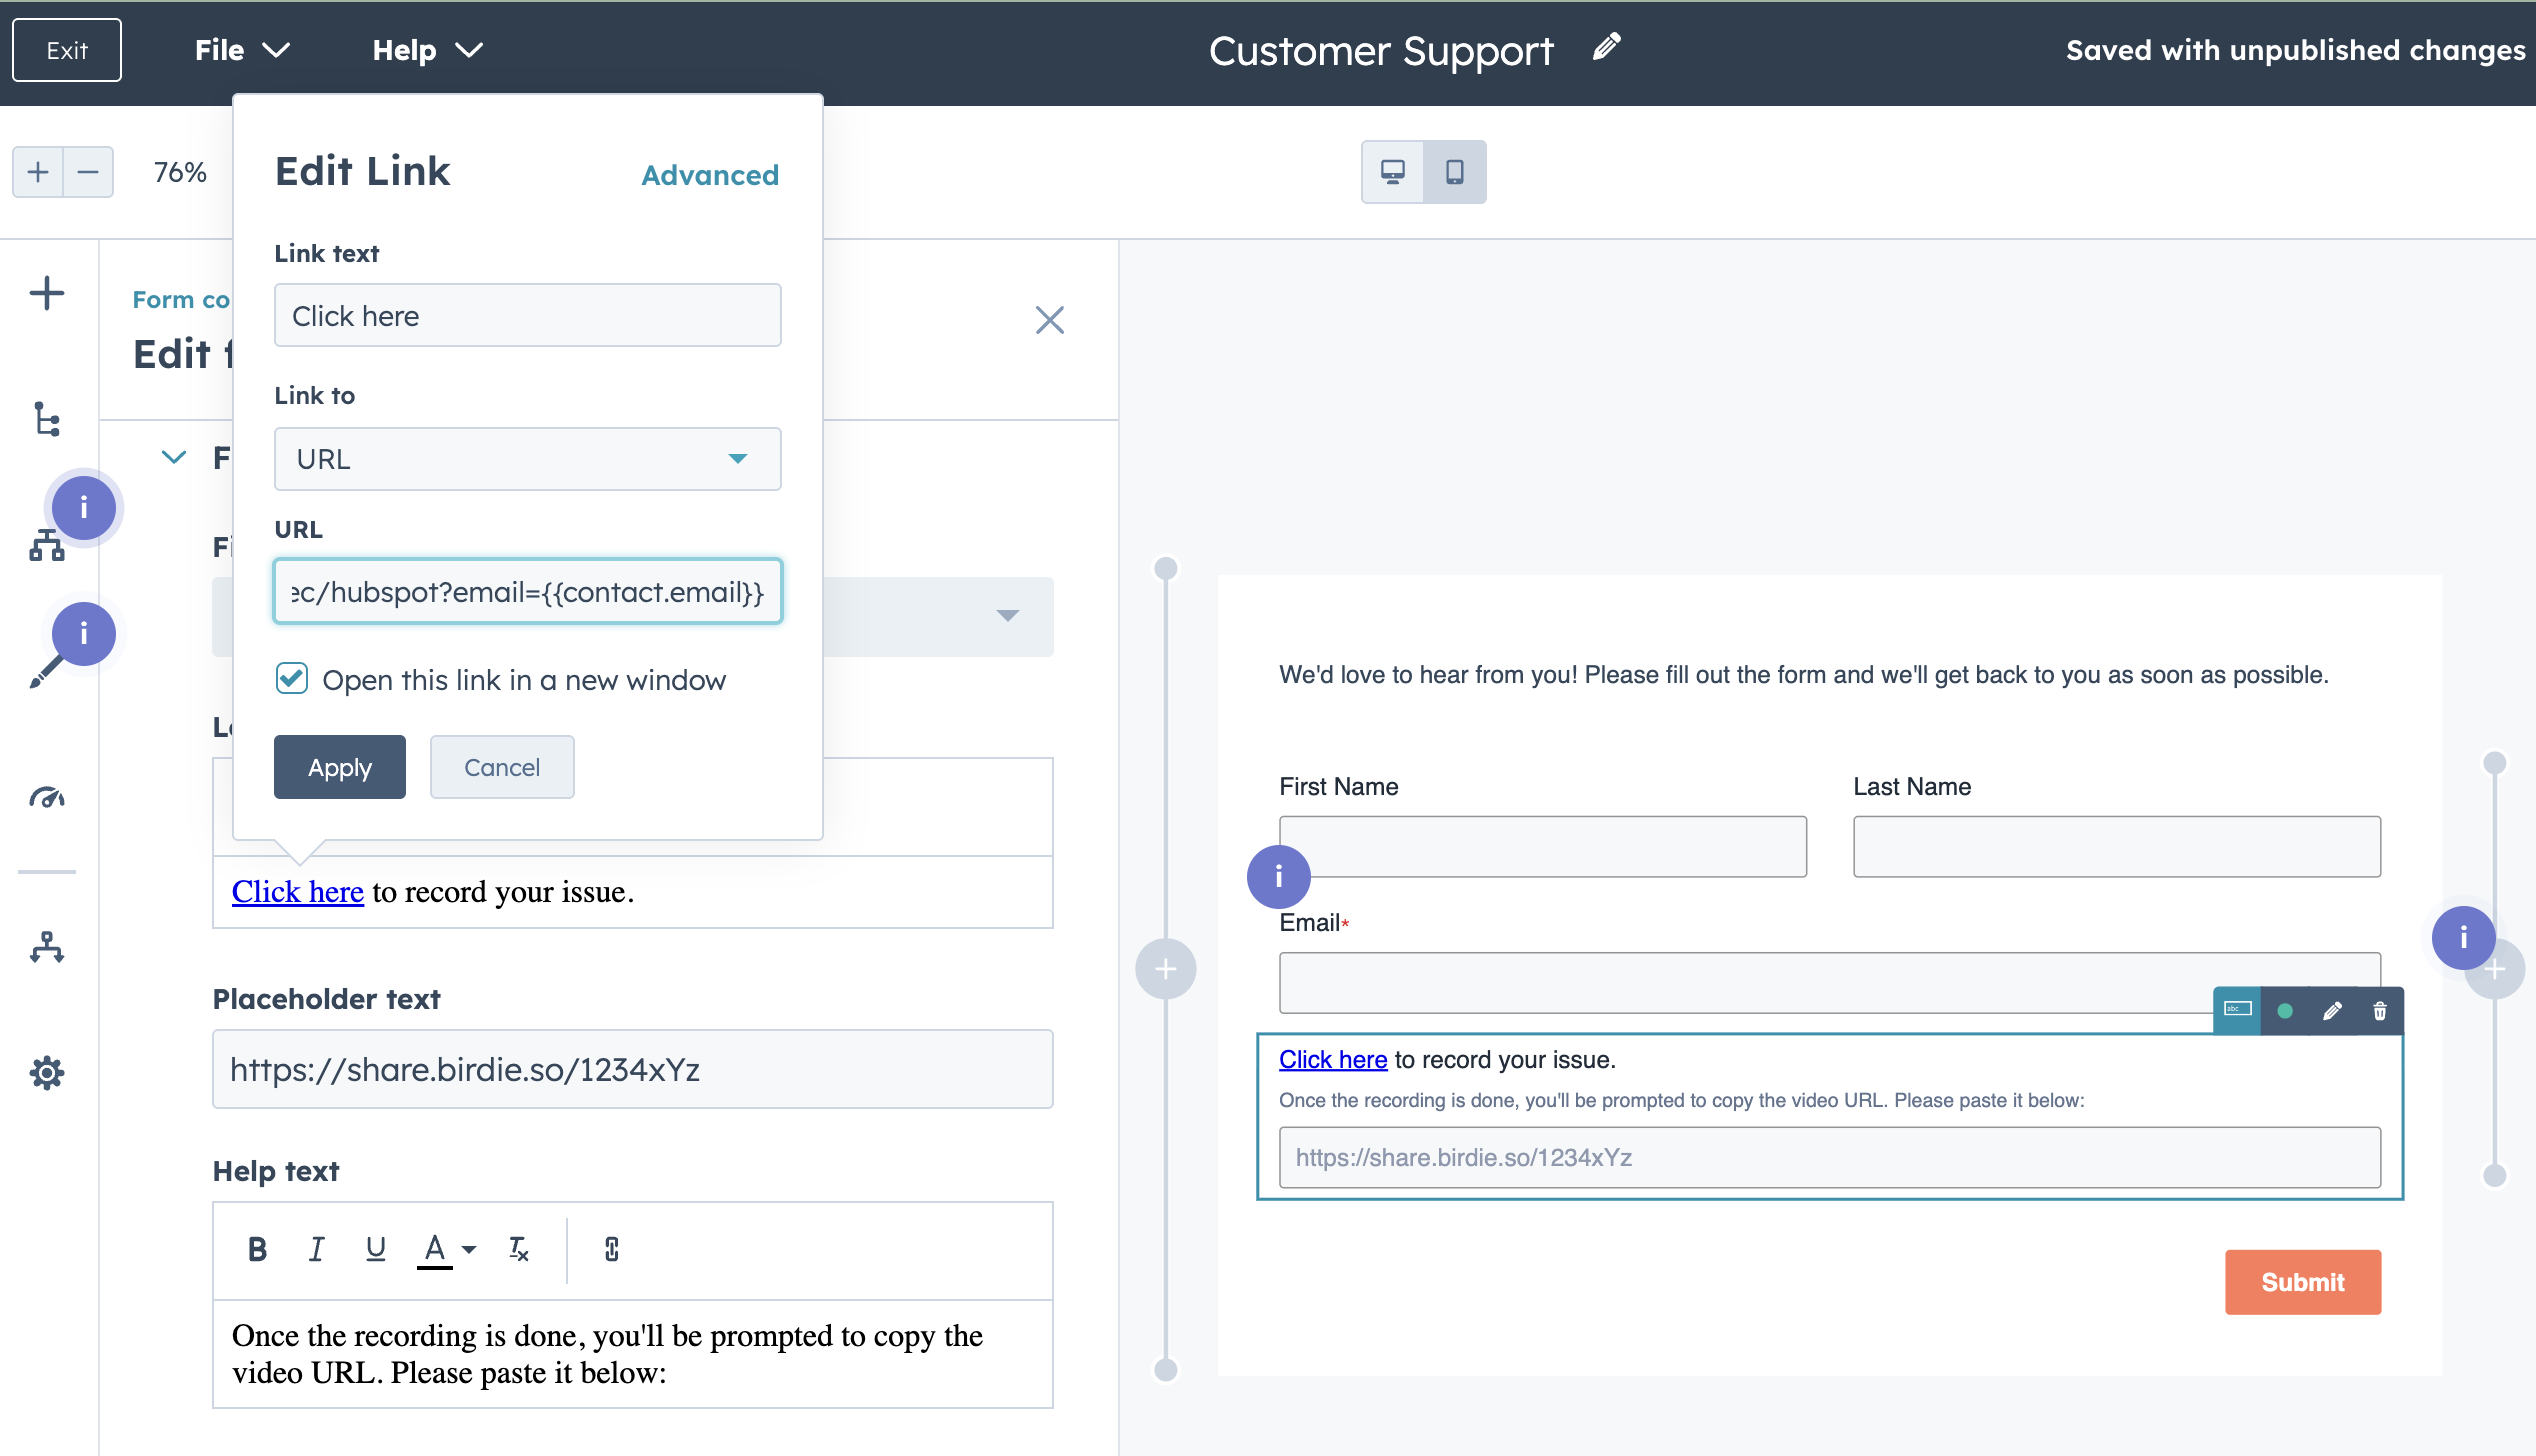
To allow customers to submit tickets with screen recordings, you need to add Birdie to your HubSpot form. Here is how it looks in a very simplistic way:
Birdie on your HubSpot Form - End User's View
### **How to Set It Up**
1. **Go to your HubSpot Forms**\
Open [HubSpot](https://app.hubspot.com/) and go to **Marketing > Forms.**\
Pick a form to edit or create a new one.
2. **Add a Birdie Request Link**\
Add a **single line text field** to your form and include your Birdie link there.\
For example: *`Click here to record your issue.`*
3. **Get Your Birdie Link**\
In Birdie, go to [`Settings > Helpdesk`](https://app.birdie.so/settings/helpdesk) and copy your **HubSpot Request Link**.\
Paste that link into the HubSpot field you just added.
4. **(Optional) Personalize the Link**\
If your users are already logged in or their email is known, you can add it to the link with HubSpot tokens:`{{contact.email}}`\
For example: `https://your-birdie-subdomain.birdie.so/urec/hubspot?email=``{{contact.email}}`\
This way, Birdie will automatically link the recording to the right user